Monday, December 12, 2011

The JOY of Mockingbird cake

Okay…so I just opened the number 12 on my Advent Calendar and the news said today was the busiest shipping day of the month. Thanks all of you who get our packages where we want them to be for Christmas, but I’ve been baking instead of shipping. Before I tell you about the recipe…here is how it came to be! Remember how I told you about how I walk everyday???? Well, since early Spring last year, my walking buddy and I have been watching a hawk that circles our neighborhood. It is a beautiful sight as it catches an air current and glides across the sky. It’s a red-tailed hawk that has a piercingly loud cry that has a descending pitch that is immediately recognizable. We always turn to one another and say, “Oh…there’s the hawk!” So, last week as we walked we heard the hawk. We stopped and looked up through the trees. The hawk cry was quite close…like right above our heads. We both searched, looking for this large beautiful bird. Nothing! We heard the cry again…no hawk, but again the hawk cry. Then, fluttering across the limb above me…a mockingbird. A mockingbird making the exact call of the red-tailed hawk AND WE LAUGHED, AND LAUGHED! What big sounds to come out of such small bird. Here’s one that visits my backyard. Sometimes I get the entire standup show with a rapid-fire string of all the sounds this little bird likes to imitate.


This same bird also does a mean cardinal imitation! One little female listens too!!


So last night, I needed a cake to take to our choir Christmas party and I thought…what would be a good Christmas cake to celebrate! I immediately thought…hummingbird….no…..pig pickin’…no….coconut, nothing says Christmas cake like coconut. And then it hit me! Mockingbird Cake will be the one I will make. I will do a little imitation of all THREE of these and make a cake that cries…CHRISTMAS!!!! Thanks to you little mockingbird for your inspiration and a new cake for Christmas!

Mockingbird Cake
Pre-heat oven to 350 degrees
Prep two 9 inch round cake pans as follows:
(for those who have asked how to line cake pans with paper easily)

Tear two sheets of wax paper the width of the pans. You can fold both sheets together and fold in half long wise and then bring ends together to create a square.


Fold square into a triangle two times creating an arrow shape.
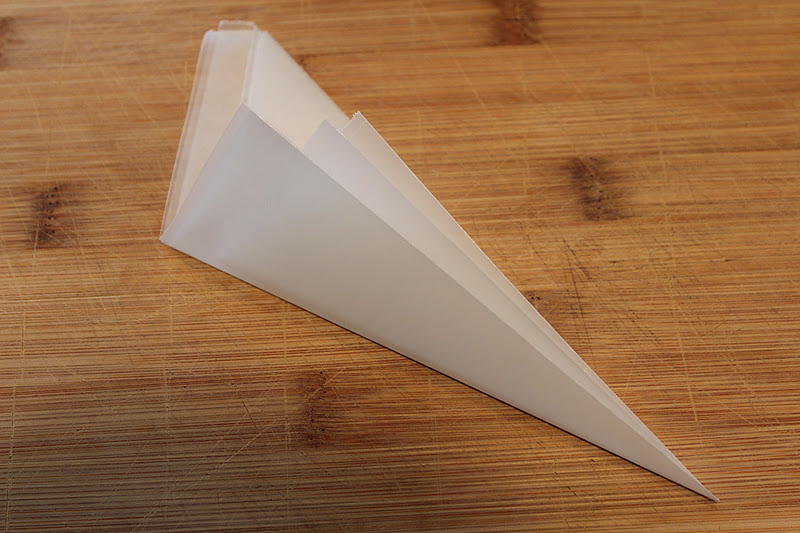


Measure by holding the arrow of paper and from the center of pan to edge and using scissors, cut across the wide end of the arrow.


Unfold!


You now will have 2 circles that will fit the cake pans.


Spray the pans and place the wax paper in the bottom. Spray paper again and then dust pan and paper with unbleached all purpose flour.


Now, measure ½ cup of dried cranberries into a microwaveable bowl. Pour 1/3 cup of peach brandy on the cranberries and place in the microwave for 1minute. (You could certainly use orange juice, or apple juice…the peach brandy just adds another layer in the fruit flavors of the cake) Allow the dried cranberries to macerate while making the rest of cake.


Drain small can of mandarin oranges and save the juice.
(Get the oranges packed in pear juice or another juice, not heavy syrup.)
Finely chop enough of the well drained oranges to measure ¼ cup.


Sift the following dry ingredients into a large bowl:
3 cups unbleached all purpose flour
1 ½ cups natural granulated sugar
1 ½ tsp. baking powder
1 ½ tsp. baking soda
1 tsp. salt
1 tsp. cinnamon
½ tsp. all spice


Stir in 1 cup of finely chopped pecans and mix dry ingredients well.


Measure 3 tsp. of EnerG (dry egg replacer) and whisk in 4 T. of the juice from the drained mandarin oranges. Allow EnerG to fully dissolve while measuring the remaining ingredients.


Smash 1and ½ to 2 bananas (enough to measure ¾ cup)


Combine:
½ cup unsweetened applesauce (jarred or homemade)
1 (8 oz.) can of crushed pineapple do NOT drain
¾ cup smashed banana
¼ cup finely chopped mandarin orange segments
½ cup plumped dried cranberries (this includes any juice or brandy not absorbed by dried fruit…most all liquid will be absorbed)


Add fruit into bowl with dry ingredients.
Then add:
½ cup canola oil
½ cup almond milk
2 tsp. of pure vanilla

Stir well by hand…no need for a mixer with this cake. EASY!!!
Divide batter evenly between the two cake pans. Smooth top and place in the pre-heated 350 degree oven. I like to place the rack in the middle of the oven to bake cakes. Bake 25 to 30 minutes. The cake will be firm to touch in the center and a toothpick will come out cleanly. Allow the cakes to cool in the pan on a rack for 10 minutes. Then run a thin knife around the edge of the cake and invert onto a cooling rack. Peel off the wax paper from the cake bottom gently.


I have small square racks that allow me to then right the cake so the top of the cake is up and the bottom is against the cooling rack.


You can ice the cake the same day that you make it, but I prefer to allow the cake to cool completely, then wrap it well in film wrap and then ice it the next day. The important thing is to allow the cake to COOL COMPLETELY before icing.

While cake is cooling I make the garnishes for the cake. I sugared some fresh cranberries and fresh rosemary. I picked some rosemary out in the garden…it is feeling like December, but this hearty herb is as green as ever. I just love having my fresh rosemary and thyme when the other herbs have died out from the cold.


The other bit of joy comes in seeing the camellia’s blooming. How lucky are we to have beautiful flowers in spite of the chilly temperatures.


Joy!


So I took the fresh rosemary and coated it in some of the EnerG dissolved in water like it was egg white. I then sugared the rosemary with some natural sugar and allowed it to dry. I did the same for the cranberries only I used some colored sugar I had in the cupboard.


It looks just like a snowy Christmas card when complete!


But back to Icing the cake…..


Icing Recipe:
I always make more icing than I need. I cannot stand barely having enough icing and making it stretch to ice the cake properly. You will have enough to put on additional cupcakes during your holiday baking. Just put leftover icing into a container and keep it in the refrigerator.

2 sticks of Earth Balance (room temperature)
8 oz. of vegan cream cheese (room temperature)
(Allowing the earth balance and vegan cream cheese to come to room temperature allows it to be creamed more easily and smoothly!!!!)
Zest of 1 medium size orange
Juice of ½ of the orange
2 tsp. of pure vanilla
2 lbs. of confection powdered sugar

Cream the earth balance and vegan cream cheese with a mixer until smooth. Add zest, juice, and vanilla. Slowly add the powdered sugar, scraping down the sides of the bowl and mixing until smooth and the spreading consistency you like. It may not take all of the sugar or it might take a bit more – it’s all about the day!! I like the frosting a bit stiffer so it is easy to spread, but loose enough to be fluffy.

Now take cooled cake, either fresh or next day after being wrapped, and level it with a thin, serrated knife. This cake is very level, but I like to take off a VERY THIN layer from the top of all cakes. I then place the first cake layer on the cake plate and slide strips of wax paper under the bottom edge of the cake. (It takes 4 strips) Do the same leveling to the second layer.


Put several large spoonfuls of icing onto the first layer, and carefully spread icing from the center to not quite the edge of the cake. When placing the second layer of cake on the filling, it will squish to the edge. The amount of icing depends totally on how much icing you like. I like about ¼ of an inch, but again it is up to your preference when eating cake. Now top the icing with the second layer of cake.


Ice the sides of the cake first. This cake is so moist and because it has a denser texture (like a carrot cake) a crumb, skim coat of icing to hold the cake crumbs in place is not necessary. Just carefully ice the sides using an off-set spatula.


Then Ice the top and smooth the icing on top and sides again. It does not have to be perfectly smooth.


BECAUSE….coconut snow is now going over all the icing. Just carefully pat it all over. I place the cake plate on a baking sheet to catch any wayward coconut so I can easily scoop it up and use it for the next sprinkle of coconut. Continue until all the icing is covered with coconut flakes!


Now using a knife, carefully push the knife against the bottom edge of the cake and pull out the wax paper that is protecting the plate from being covered in icing and coconut. Continue until all four pieces are out and you have a clean edge. I use the knife to push everything back in place. I piped an edge around the bottom of the cake, but it is just fine to leave it as is…totally up to whether you like to pipe icing. Just takes a little practice with the bag and piping tips and gives the cake a finished look. Add the sugared cranberries and rosemary made earlier.
I placed some around the bottom….


And some on top…..


Oh….what a little mimicker mockingbird cake…hehe!!!


Don’t you just LOVE cake!!! We love cake here in the South, especially at Christmas. It brings joy to the party…it just does! Which brings me to my word this week, JOY! Yes, the third candle we lit yesterday on our Advent wreath was the pink candle…the JOY candle.


Like peace, joy has nothing really to do with life circumstances. Joy is a gift that is within…it is this byproduct produced from just fully enjoying the moment. Don’t you find that when you truly enjoy something like a beautiful song – joy just wells up from within you??? That so happened while the choir was singing yesterday. A beautiful, college student sits next to me in choir. We were singing, “Joy to the World”. The organ was full, and the brass was soaring. Our voices joined in this grand final phrase, “And wonders of His love” and Allison whispered, “NOW, it’s Christmas!” Thankfully, it isn’t quite, but I fully understood that feeling. This young woman’s finals were over, she was about to go back to her hometown and be with family.  The swelling experience that surrounded us up in that choir loft can only be described as pure JOY. We were taking in and enjoying that moment. Joy came like a wave over, and around, and within us! Everyone was smiling. Joy is a way of experiencing life. Joy is seeing the glass ½ full, looking at the silver lining, not giving into despair. Joy makes smiles spontaneously appear. Like what happened when we were trying to get the pugs to dress up in their Santa hats.


Hope’s eventually became a beard.



So I smile and laugh! I am so filled with joy, even from two little Santa pugs.

When I woke up this morning…the full moon was just going down and the pink ribbons of a new day were woven across the sky. A new day! 


I took the picture and then looked at the rocking chair on the front porch...the pillow says, JOY!!!!!
Like I’ve said…you can always find a sign. You only must stop and look!


Look for joy this week! Eat cake and take in some JOY!!


Thoughtful living moment today: Take in all of life and enjoy each moment…it is there…deep within you...that joy will be born!




Monday, December 5, 2011

Muscadine, Rosemary Christmas Jelly

It is now December! Whaaaatttt!!! I know…breathe deeply…it comes the same time every year. You would think I would be prepared, but it sneaks up on me every year. I am not a work ahead kind of person. I admire those people…you know…the ones who have the special closet where they stash gifts all year long. I admire the people who make things ahead to give as gifts. I admire the people that have their Christmas cards done the week of Thanksgiving. I bow before all of you, as I am not worthy. I have tried…but I have decided....I like the urgency of getting it done between now and Christmas…it makes it exciting. CRAZY…but it is exciting. So I started this week making some of my gifts. It is always fun to take something special that cannot be bought in a store as a hostess gift or “add in” to a gift box. This week I started making my Christmas jelly!!! I think I should get some points for picking these grapes back at the end of September. You know, I WAS planning ahead a bit to do that much!!! Hehe!!!


This small vineyard is a place of peace and tranquility not far from my house. I am so blessed!!! My mother and I went on a beautiful Friday afternoon at the end of September and picked the most beautiful muscadine grapes. Okay, if you aren’t from the South, you may not be as familiar with these grapes. They are large, sweet and they make wonderful jelly. They are also great to eat, but just know the skins are thicker and the seeds much larger than other grape varieties. The great thing about Chestnut Trail Farms Vineyard is they do not spray, so you can eat them right off the vine!! They even encourage you to eat as you pick!!! FABULOUS!!!! I try and restrain myself…it is so FUN!


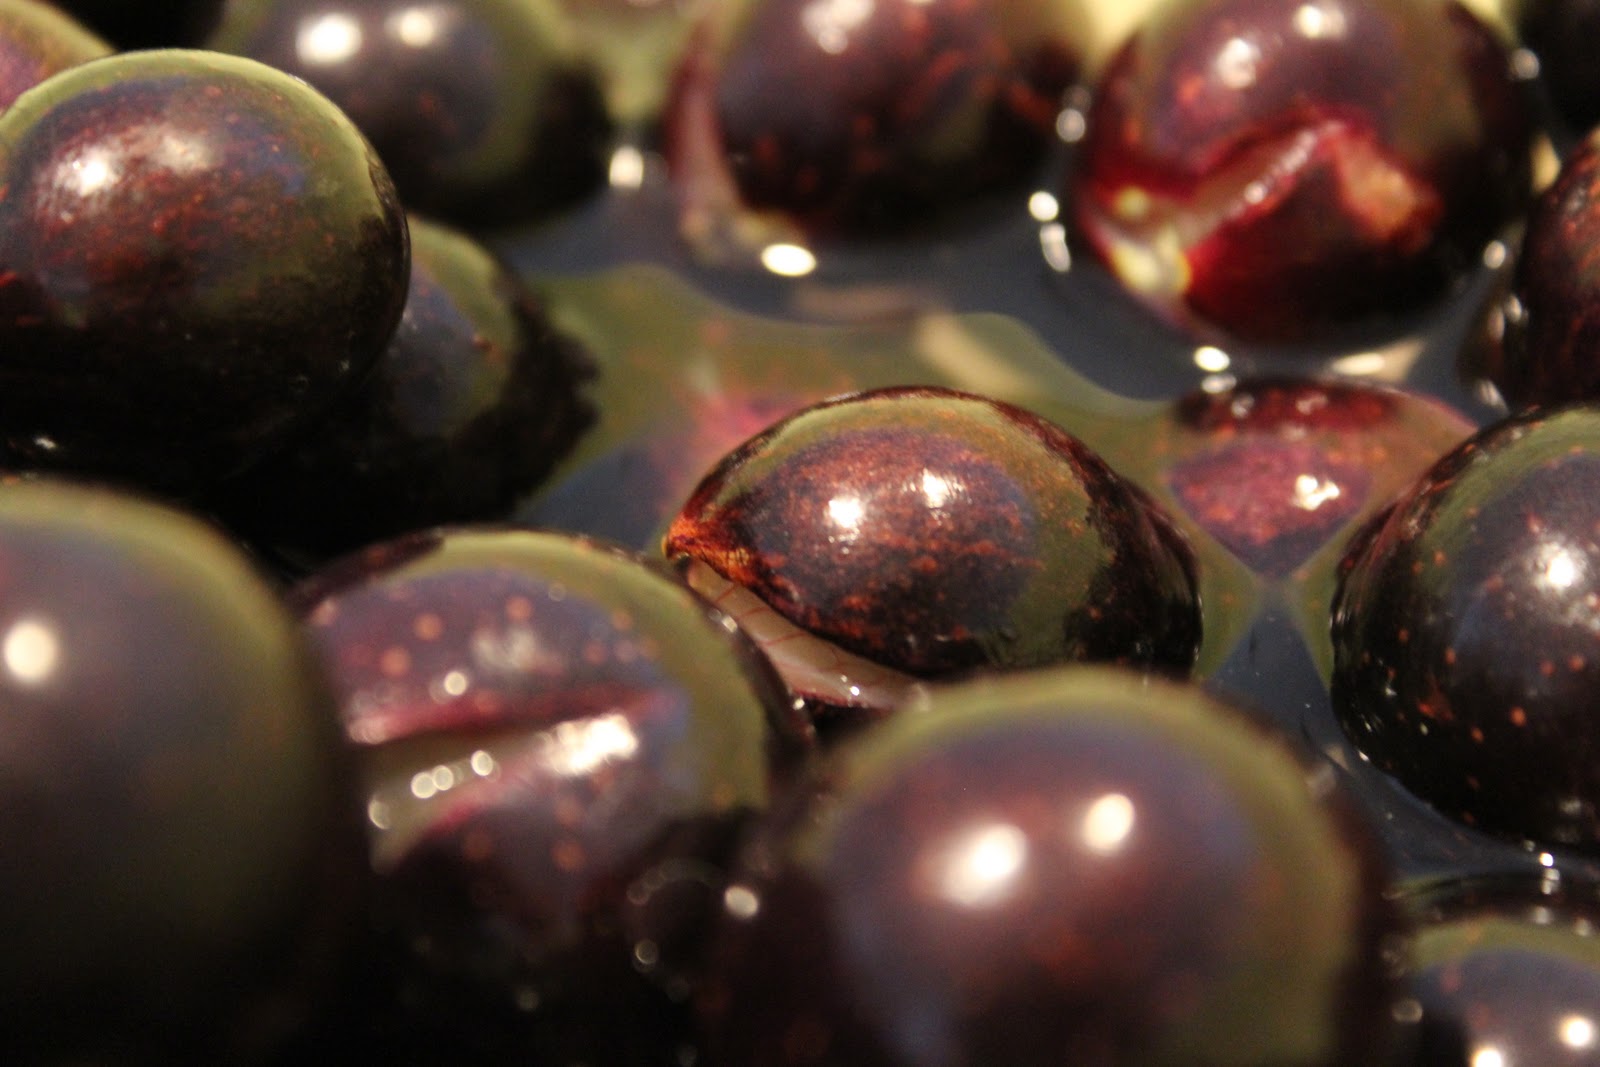
This farm grows a number of varieties, but I picked the James muscadine grape this day back in September.


You are wondering, how if I picked in September, that I am just now making jelly??? Good question…easy answer! You freeze these jeweled globes until you are ready to work them up!!! BRILLIANT! 
After bringing them home, I simply place them on a cookie sheet (DO NOT WASH) 
and 
freeze them solid.


Then once frozen, I pack them into freezer bags.


Then when I am ready to make jelly, I take them out of the freezer and give them a rinse.


I let them start thawing out on the counter and get all of my ducks in order to make jelly. What??? You have never made jelly??? It is so easy and it really doesn’t take as much time as you think. The taste is SO superior and you can do it lower in sugar and get creative with the flavors!!! FUN! So this is my Christmas jelly made with muscadine grapes and rosemary.


 Rosemary has that Christmas-ey, piney, smell and flavor that is a great balance to the sweetness of the muscadine. Rosemary is also the herb of remembrance and thus the symbolism of the Christmas season is perfectly paired in this jelly recipe. 
Remember Christmas…the gift to the world found in the sweetness of a tiny babe.


Making Christmas Jelly
Wash the jars. (This recipe makes six ½ pints of jelly – so wash six ½ pint jars;-))
Jelly does best when made in small batches, so don’t be tempted to increase the recipe, just make more!!


Start heating the water in a canning pot, It takes longer than you think for this much water to boil. A canning pot is easy to find in local hardware stores. It is just a large enamel pot with a rack inside to hold the jars upright.


I use ½ pint jars (perfect size for jelly jars) and they use regular lids and rings. When you first buy jars they come with lids and rings, but after you have used the jars, you can just buy new lids, unless you give them all away – which is the point, but you may have some friends give you back the jar and say, “Please refill this!”  Lids can be purchased separately from the jars…even at the grocery store!!

Once the jars are washed and rinsed well, place them in a deep pot of boiling water to sterilize. The jars need to boil for 10 minutes. I know this sounds picky, but you must have them safe to preserve food products. You can also do this in your dishwasher on the sanitize cycle, but for jelly made in such small batches, it seems to be a waste of energy to use the dishwasher. Just boil the little jars for 10 minutes and you are good to go!!! I then keep them in the hot water on low while I am making the jelly.


I start with about 5lbs of grapes per recipe…that is standard on most all the pectin instructions. If you aren’t sure, just know you are going to need 5 ½ cups of juice. You can also start with all natural, unsweetened grape juice from the store and skip the fruit preparation part of this recipe. (Just start with the juice in the pan and begin the recipe where you add the pectin. You can always add your own flavor enhancement before adding the pectin too.)

Back to the fruit prep:
Crush the grapes! I just use my potato masher. I place smaller amounts of the grapes into a microwaveable bowl and heat for 2 minutes to warm the cold grapes. I then mash away!!


 Place the crushed grapes into a deep Dutch oven or soup pot and cook to break down the grapes and help them release even more of the juice and color!!  
Bring this juice to a boil. You should not even need to add any water with this method.


 Add 1 cup of fresh rosemary “needles” 
(Just rake the leaves from the woody stem – just makes it easier to measure 1 cup). 
Lower the heat and simmer 
(little bubbles breaking the surface) 
Cooking all of this for 10 minutes.


While cooking I get my straining system in place. I cut three large squares of cheesecloth and place them in my colander. Wet the cheesecloth AFTER placing in the colander. The cheesecloth is too flimsy to move around after wetting, so having it in the colander BEFORE wetting makes life easier. Place colander and stand into a flat -bottomed bowl. If you don’t have a cone shaped colander just line bowl shaped colander the same way and place in large bowl.


This cone shape colander with the wooden pestle is perfect for pressing the juice into a bowl, while leaving the skins, pulp, and seeds behind.


The juice left in the bowl is a jeweled purple treat!!!!


Place the strained grape juice into a large Dutch oven or stock pot. Measure to make sure you have exactly 51/2 cups.
(Start here if buying natural juice)


Mix 1 package of premium fruit pectin with ½ cup sugar.
(I use the kind requiring less sugar)…okay specifically Sure-jell - the pink box.


Whisk this pectin sugar mix into the juice.


Bring this now to a FULL boil. That means that it does not stop boiling even when you stir it. It will take maybe 10 minutes

While this is coming to a boil…put the jar 6 lids (the flat disks with the orange/brown seals) into water that you need to bring to a simmer. Do not boil – just hot simmering water to soften the seals.

Okay, so the juice is now at a rolling boil. Now add 3 ½ cups more of sugar and stir well. Return juice to a rolling boil. Once it is back to boiling…time it for 1 minute.
Then take the juice off the heat and skim off the foam from the surface of the juice. This will ensure your jelly is clear. Just spoon it off carefully.


Take hot, sterilized jars out of hot water and turn over on a clean towel.


Right the jar and ladle the hot purple goodness into the hot jar.
(A jar funnel really helps keep this neat, but you can do this carefully with out a funnel)
Fill the jar to ¼ of an inch from the top.


Wipe the surface of the jar lip with a damp cloth. This ensures a good seal. After all this work, you want the jars to seal!!!

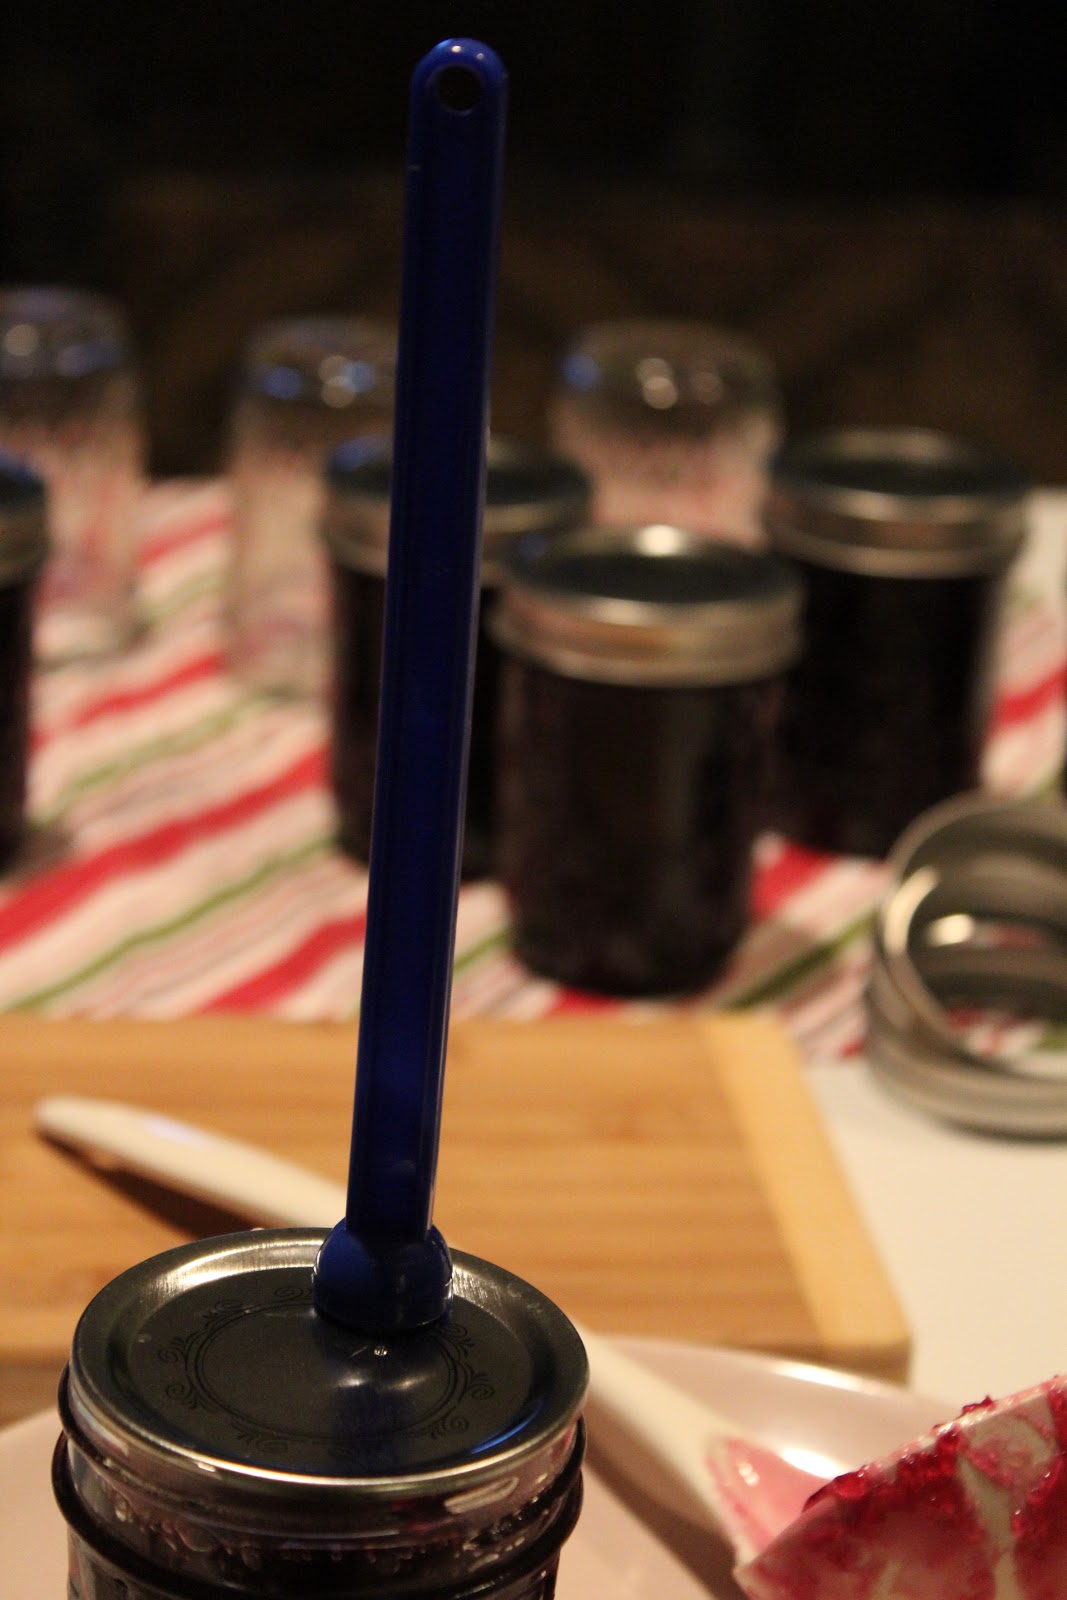
Place a lid from the hot water onto the jar. I have this lid lifter that has a little magnet and lifts each lid. Cool invention, but you can do this carefully with tongs too!!


Screw the band onto the jar tightly and repeat until all the juice is ladled into jars.


The water should be boiling in the canner. Lower each jar carefully into the boiling water. The water should cover the top of the jars by a couple of inches.


Set timer for 5 minutes. Cover the canner and allow the jelly to process in the hot water bath for 5 minutes.

 Should not all the juice fit into the jars – you can place it into a small container to be refrigerated. It is called the chef’s portion and awwww….I had some left that I had to leave out!! Yummy!!

When the 5 minutes are up. Carefully lift each jar out of the bath and place on a towel to cool.


You may hear immediate “pings”, but sometimes it can take awhile before the seal is complete. I leave the jars on the counter overnight so they are completely cooled before moving them. The middle of the lid should be sucked down and not make any kind of popping noise when you press. If you hear this sound, simply refrigerate that jar and use it first. It will be gone in no time.


Food Art!

So……I couldn’t wait to try the jelly. I whipped up a batch of whole-wheat biscuits and Oh my….I got a “GOOD DO” as my dad use to say! Sweet, but not cloying! There is a hint of savory, piney rosemary, but not too much bitterness. Christmas jelly for sure!! 
A sweet remembrance for the season!!


So, you ask…why jelly?? Well, yesterday we lit the second candle on our Advent wreath. This is the candle of PEACE.


For me…making jelly IS all about peace. Peace so needed in our world. This beautiful fruit is crushed and bruised and cooked until it falls apart. It releases every bit of itself. Out of all of this mess, comes a clear, jeweled liquid. A substance transformed… shining and translucent. It is a quiet process…making jelly. It takes awhile to prepare and then it all happens quickly…within minutes. Out of the churning and boiling  comes this sweet liquid that is poured out as a gift. Peace is like that. It seems nowhere in sight…nowhere to be witnessed. Everything seems to be a mess!  Then in some small, quick moment.... a glimpse of full blessing is felt. An internal "ahhh" that feels perfect. It feels divine. Peace is not the absence of chaos and turmoil…no…it is a sense of full blessing inspite of the external chaos churning all around us. 
For me this week, my peace moments came in small, lovely moments.


Peace came in a passage of music that caused time to stand still as the bowed head of a little pug listened intently.


Peace came in the song of the little bird outside my window calling me out to listen.


Peace came in the changing sky as it morphed into darkness behind the stark, bare branches of our trees.


So these might not be answers to world peace, but they are a small grape’s worth. These are MY moments of peace this week INSPITE of the chaos churning around me. Sweet jelly to bottle up and savor in the days ahead. So prepare…even if you don’t make Christmas jelly! Prepare…. so that you are ready when the sweet moments of Christmas peace come to you in the days ahead! Stay alert….wait…be still…and there WILL BE A SIGN!


 Thoughtful living moment today: Find a time to be still…then…. you will recognize the peace that was present all the time…you just didn’t realize it!!!
Peace...